How to use the online melodica
On a phone, touch a white or black key and hold your finger down to sustain the sound. On a computer, use the letters printed on the keys. You can also Tab to a note button and hold Enter or Space. The range menu gives you access to more notes without squeezing the entire keyboard onto a small screen.
Find your way around the notes
C is the white key immediately to the left of a pair of black keys. Moving right from C gives D, E, F, G, A and B. There is no black key between E and F or between B and the next C. The number distinguishes octaves: C5 is one octave above C4.
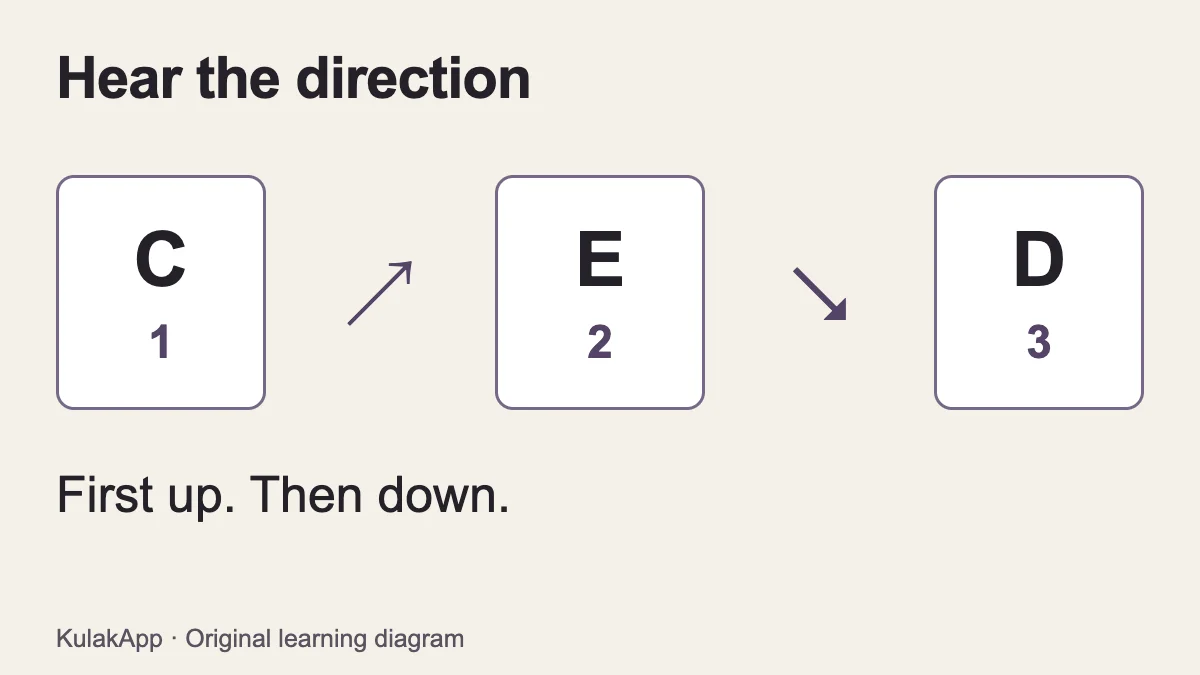
Start with C–D–E in the middle range. Then try C–E–D: listen to the first movement going up and the second going down. Focus on hearing the direction rather than playing faster.
A three-minute starting routine
- First minute: Find C in the middle range. Play C–D–E–D–C and listen to the pitch rise, then fall. If you hit an unintended key, compare those two pitches separately rather than restarting at speed.
- Second minute: Alternate C–E with C–D. Both pairs start on the same note, but the second pitch is a different distance away. Read the labels first, then look away and listen for that difference.
- Last minute: Start the listening example above and match the sequence. Replay it if needed. If one pitch does not match, slow down and practise that transition on its own.
The timing is a practice suggestion, not a measure of success. Focus on pitch direction and the space between notes, rather than memorising one answer.
What are the black keys for?
Black keys provide the intervening semitones between some neighbouring white keys. The black key just to the right of C is C-sharp; the same pitch can also be called D-flat. This tool uses sharp labels. Start on white keys, then slowly play C–C-sharp–D to hear the smaller steps.
Is this the same as a real melodica?
The sound comes from recordings of a real Hohner melodica, adapted for this keyboard. Nine recorded notes are tuned, looped and transposed to cover the playable range; not every key has a separate recording. This is still not a physical instrument: a melodica needs airflow, while this tool does not measure breath or blowing technique and does not open your microphone. Key resistance and finger feel are different. Use it to explore note locations and short pitch sequences.
The tool provides 32 chromatic notes from F3 to C6, with one range visible at a time. This does not mean that every physical melodica model has the same range.
If you cannot hear a sound
- Tap a note first; audio does not start automatically.
- Check the tool volume, your device media volume and the selected audio output.
- Bluetooth audio can add delay. Try the device speaker or wired headphones when checking timing.
- Stop sound releases all playing notes.
What to try next
For another keyboard sound, try the virtual piano. Try the ear training test or practise identifying written notes with the note reading test. These are short starting exercises, not assessments of overall musical ability.
Where should a complete beginner start?
Start with three neighbouring white keys rather than a whole song. In the middle range, find C, D and E. Play one key, read its name, and listen before moving to the next. The immediate goal is to connect a visible position with a sound. If you miss a key, identify the pair you confused instead of restarting everything at a faster speed. A specific mistake gives you something useful to practise.
A touchscreen does not reproduce the spacing, resistance or feel of a physical melodica keyboard. Use this page to explore pitches, not to establish a complete fingering technique. When you move to an instrument, follow appropriate guidance for hand position and finger changes. Being quick on a screen is not the same as controlling a breath-powered instrument. Keeping those goals separate makes the short online practice more useful.
Holding notes, choosing a release and adding reverb
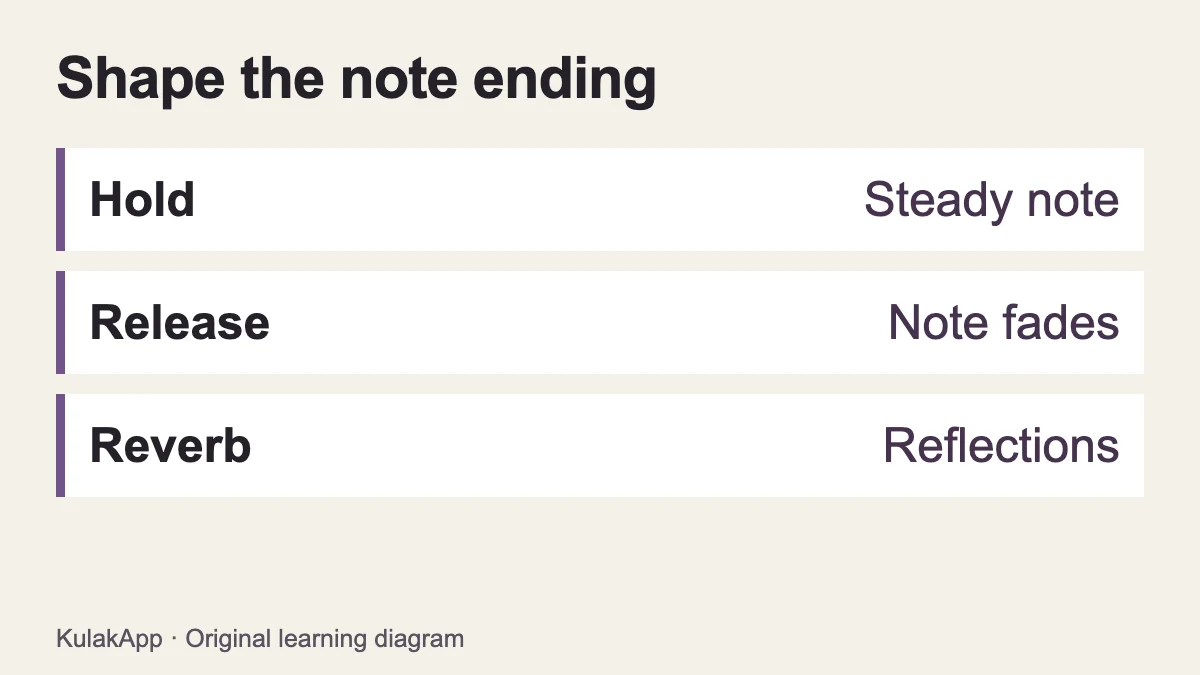
Hold a key to keep its recorded note sounding: a short, blended loop extends the sustained part of the sample. Once you release it, the Note release setting controls the fade. Short ends the note quickly, Soft leaves a brief fade, and Long allows a more noticeable tail. These options do not change the note name or pitch. C4 remains C4 whichever release you choose. Try a single note before playing a sequence so you can hear what the setting changes.
Reverb is a separate effect that adds a room-like sound around the note. It is not another name for release. Release controls the fading source note; reverb adds reflections after and around that sound. A little reverb can make the tone feel less dry, but too much can blur closely spaced notes. Turn it down when you want to hear the beginnings of individual notes clearly, especially in the short listening exercise.
If the instrument sounds quiet, check the selected audio output before raising every control. Increase the tool volume gradually, starting with a low device level. Reverb is not a substitute for volume: it changes the character and tail of the sound. The Stop sound button cuts both the notes and the remaining reverb. You can use it between attempts when a long release would otherwise overlap your next example.
Original short exercises using C, D and E
The following patterns were written for this guide; they are not transcriptions of a familiar song. Play each note slowly enough to hear it separately. Read the names first, then try recalling their order without looking back. These note-name sequences do not specify rhythm. Giving each note roughly the same length is one reasonable starting choice, but it is not a scored timing requirement.
- Neighbouring notes: C–D–E–D–C. Follow the rise and fall while moving between adjacent white keys.
- A skip and a return: C–E–D–C. Notice that the first move skips D, while the return uses neighbouring white keys.
- Finding the starting pitch again: D–E–D–C–D. Check whether the last note matches the first one.
- Repeated notes: C–C–D–E. Release and press C again so you hear two starts rather than one continuous note.
When a pattern becomes easy, you do not have to make it longer immediately. Try recalling it without reading the names. Then describe whether each move goes up, down or stays on the same pitch. Naming a note, hearing a direction and selecting a key are related but different tasks. Difficulty with one does not show that you cannot do the others. Choose the task you want to practise rather than treating the whole attempt as one pass or fail.
A practical five-minute session
Choose one small aim before you begin: locate C, compare two pitches, or reproduce three notes in order. Trying to perfect every skill at once makes feedback harder to interpret. This schedule is an optional way to organise a short session, not a required training programme or a promise of results. You can shorten it, pause, or return later when you are ready to listen carefully.
- Minute one: Find C, D and E in the middle range. Match each written name with its key and sound.
- Minute two: Alternate C–D and C–E. Compare how far the second pitch moves from the shared starting note.
- Minute three: Choose one pattern above. If a transition is awkward, isolate those two notes before trying the full pattern again.
- Minute four: Listen to the built-in three-note example and reproduce its order. Replay it if needed; replaying is part of practice, not a failure.
- Minute five: Write down one specific observation, such as “I mixed up the second and third notes.” That is more useful than a broad label about your musical ability.
At the next session, return to that particular transition. Remember that memorising a fixed example is different from recognising a new sequence by ear. This page uses one short example, so it cannot establish a general improvement rate. For a wider range of listening material and continued practice, move on to the relevant exercises in KulakApp rather than repeatedly treating the same three notes as a fresh assessment.
Common points of confusion
Does a higher note mean a louder note?
No. Higher and lower describe pitch here; louder and quieter describe level. C5 is an octave above C4. Moving the volume slider does not turn C4 into C5. To separate the ideas, play one key at two modest volume settings, then compare C4 and C5 at the same setting. Avoid raising the device volume unnecessarily. The comparison is about the relationship between sounds, not how forcefully you can make them play.
Is every black key a sharp?
The tool labels black keys with sharp names to keep the display compact. Those are not their only possible names. On this equal-tempered keyboard, C sharp and D flat use the same key. Also, a sharp is not always a black key: E sharp uses the same key as F. In written music, the chosen spelling communicates musical context, so do not replace every accidental with whichever name seems easiest to remember.
Does finding one note mean I can play a melody by ear?
Finding a starting note is useful, but a melody also requires you to follow subsequent pitch changes and their order. Begin with pairs and then short sequences. When you find a pattern, consider how you found it. Did you try every key at random, or first decide whether the next sound was higher or lower? Practising that listening decision gives the attempt a clearer purpose than counting the number of keys you happened to press.
Using the keyboard on a phone or computer
On a phone, use the range selector instead of trying to fit every key onto one narrow screen. Low, Middle and High reveal different parts of the same 32-note range. They do not open separate instruments. Changing the range stops existing notes and resets the short listening attempt. If you want to hear the example again, start it afresh rather than trying to continue a partially completed answer in another range.
On a computer, the letters shown on the keys refer to the currently visible range. Changing that range changes which pitches those letters play. Do not learn a computer letter as a permanent musical note name. If a shortcut seems unresponsive, check whether a form control has keyboard focus. You can also use Tab to reach a note button and play it with Enter or Space; a mouse is not required.
If several notes seem to run together, the cause may be an effect setting rather than the wrong key. A long release and reverb intentionally allow a sound to overlap what follows. Select Short and reduce reverb to zero, then repeat the pattern. This simple comparison helps you separate a note-selection mistake from the sound texture you have chosen. Restore a little reverb afterwards if you prefer it for free playing.
What can this short tool tell you?
The virtual melodica lets you explore note positions and try a small listening task without downloading an instrument. It does not assess breath control, tonguing or physical playing technique. A result of three out of three means that you selected these three pitches in the expected order. It does not establish overall musical ability, predict an audition result or show that you can play an unfamiliar piece on a real melodica.
You can vary the purpose of your practice: focus on key positions one day and the distance between sounds another day. Playing more notes faster is not the only useful observation. Making fewer random guesses, identifying the transition you confused, or describing the direction of a pitch change are also things you can notice. Treat them as personal practice observations, not as extra measurements that this page secretly calculates.
Sound recordings: Hohner Melodica by fese, licensed under CC BY 4.0. KulakApp trimmed and normalised the public preview recordings, added sustain loops and adjusted tuning and playback pitch. The creator does not endorse KulakApp. These recordings retain their open licence. The exercises, text and diagrams are original; no third-party song transcription is used. For the physical instrument’s mechanism, see Yamaha’s explanation of the breath-powered keyboard.
Replay a short idea without a microphone
Choose Record a take, play a few notes, then Stop and Replay take. The tool remembers note presses and timing for up to 20 seconds in this tab, not a recording of your voice or surroundings. Clear take removes it; closing or reloading the tab also clears it. Listen and follow plays an original six-note example on the highlighted keys. Try it yourself afterwards. Large playing view opens a roomier keyboard panel; close it or press Escape to return to the guide.
Take the note pattern to a physical melodica
Computer shortcuts are not physical finger numbers. The melodica fingering guide explains a five-note starting position, the change needed for a full C major octave and short patterns for checking the transition on your instrument.
Play a complete little melody, not just a row of keys
A row of note names tells you where to move, but a melody also needs a sense of time and a place to finish. Try the original four-bar example below on the virtual melodica. Keep the Middle range selected: every note is between C4 and G4, so you will not need to change the visible keyboard. First read the entire example without playing. Notice that the last bar returns to the starting note.
Count four steady beats in each bar. A letter without an extra instruction lasts one beat in this example. “Hold for two” means keep that key down across two counts, without pressing it again halfway through. Start slowly enough that you can release one note and locate the next without interrupting your count. You are choosing a manageable practice pace, not trying to meet an official tempo requirement.
| Bar | Play these notes | What to notice |
|---|---|---|
| 1 | C4, D4, E4 held for two beats | Three rising notes occupy four beats. |
| 2 | E4, D4, C4 held for two beats | The direction reverses; the rhythm stays the same. |
| 3 | D4, E4, G4, E4 | Four separate starts; the move to G skips F. |
| 4 | D4 held for two beats, C4 held for two beats | Two longer notes bring the phrase back to C. |
Check the arithmetic before listening critically: the first bar contains one beat plus one beat plus two beats. The third contains four single beats. Neither bar is longer because it contains more written letters. If that distinction is unfamiliar, the explanation of quarter, eighth and sixteenth notes connects written values with a steady pulse.
Use the short recorder to answer one question
At a steady 60 BPM, this sixteen-beat example takes about sixteen seconds, which fits within the tool’s twenty-second take limit. That calculation assumes you begin promptly and leave little extra silence. Record one attempt if the controls are available, then listen for a single detail: did the held E in bar one last as long as the first two notes together? The recorder replays your actions; it does not calculate whether the phrase was rhythmically accurate.
If you prefer a slower pace, record two bars instead of trying to squeeze the whole example into the limit. Listen to bars one and two as a question and answer. Once their timing feels clear, work on bars three and four separately. You can play the whole phrase without recording it; the limit applies to the memory-only take, not to ordinary use of the keys.
Now change just the third bar to D4, F4, G4, F4. Keep all the durations and the other bars unchanged. You have made a small pitch variation without changing the rhythmic shape. Compare the two versions and describe the difference in ordinary words before reaching for a theory label. The exercise is about hearing a deliberate edit, not identifying a famous tune.
Make the same notes teach you something different
You do not need a new song every time you open a browser instrument. The purpose of a familiar phrase can change. In one attempt, look at the keyboard and name each note before playing it. In the next, read a whole bar, look away from the written example, and recall that bar. Finally, play a pair of notes and describe the direction of the movement without naming either one. These are different tasks, even though the keys have not changed.
For a pitch-distance comparison, play C4 followed by D4, then C4 followed by G4. Both pairs rise, but the second covers a wider interval. Keep the volume modest and use similar note lengths so a loud or long note does not distract you. If you want a more systematic next step, try the interval listening exercise. This page is a keyboard for exploring sounds, not a replacement for varied interval questions.
For a rhythm comparison, use C4 for every note of the four-bar example while keeping its durations. Removing pitch changes makes the timing easier to notice. Then put the original pitches back. If your timing becomes uneven only when the notes move, slow down or practise the awkward transition on its own. You have identified a coordination demand rather than proved anything about your overall musical ear.
Compare instruments without confusing sound and pitch
Open the virtual piano and find the same named notes and octave. A piano-like tone and a melodica recording have different attacks and sustained qualities, even when they represent the same pitch. Compare one note at a time and stop the first instrument before sounding the other. Matching the loudness approximately helps, but the two volume sliders are not calibrated to produce identical perceived levels.
For rhythm alone, use the online drum kit. Its kick and snare pads are not substitutes for the melody’s note names. Instead, try marking the numbered beats with one percussion sound while speaking the melody’s note order. Keep the tasks separate at first. Opening several sound tools and playing them simultaneously can create confusing overlaps; it does not make a more informative listening test.
Questions that come up while playing
Can I play a familiar song with these keys?
You can explore a melody whose notes fit the available range. The tool does not supply a licensed collection of popular sheet music, automatic song recognition or a full accompaniment. If a passage goes beyond F3–C6, changing the visible range will not create notes outside those limits. You may be able to move a suitable phrase by an octave, but that changes its register and may not solve every range problem.
Why does my take sound different from the example I imagined?
Separate three questions: are the note names right, are the starts in the right order, and are the gaps what you intended? Check the names first with a short pair. Then listen to the timing without watching your hands. A long release can blur a boundary, so compare a dry, short-release version before deciding that you held the wrong key. This comparison is something you do by listening; the tool does not diagnose the cause automatically.
Should I practise with the note labels visible?
Use the labels when your aim is to learn where notes are. When your aim is to remember a short phrase, read it first and then shift your attention to the sound. Looking away is optional, not a test rule. You can also ask someone to read out a short sequence for you to find. Keep the number of notes small enough that a memory challenge does not conceal whether you understood their positions.
What should I do after this short session?
If finding the next pitch was difficult, use the guide to finding notes by ear to practise a more deliberate search. If physical finger changes were the problem on your own instrument, return to the melodica fingering guide instead. For continued listening practice, choose the relevant exercise in KulakApp through the store buttons above. The useful result of a web session is a clear next task, not simply a larger number of notes played.
Find a note, then play a short phrase
If you are unsure which key to choose, use the illustrated melodica note map. Once the names are familiar, try three short original melodica melodies with letter notes and audio. The exercises practise held notes, rests and eighth-note pairs without asking you to learn a long piece at once.