Melodica fingering: finger numbers, hand position and practice patterns
On a melodica, finger numbers tell you which finger to use, not which note to play. For the right hand, the thumb is 1 and the little finger is 5. A comfortable starting position puts those five fingers over C, D, E, F and G. Longer phrases need a plan for moving the hand; there is no permanent finger assigned to every key.
This guide is for someone who can find a few notes but keeps running out of fingers or changing fingering on every attempt. The examples use the right hand on a physical keyboard. You can check their pitches with our virtual melodica, but a touchscreen or computer keyboard cannot reproduce the hand movement, key resistance or breath control of the instrument.
Read the finger number separately from the note
The numbering is straightforward: thumb 1, index 2, middle 3, ring 4, little finger 5. Both hands use that numbering, but the examples below are specifically for the right hand. A left-hand fingering must be planned separately; copying the right-hand sequence onto the left hand does not automatically produce a useful movement.
A note name answers “which pitch?” A finger number answers “which finger?” An octave number answers “which occurrence of that note?” In C4, the 4 identifies the octave in scientific pitch notation. It does not instruct you to use your ring finger. Similarly, the letter A printed as a computer shortcut on a web keyboard is a control label, not a physical fingering instruction.
| Label | Meaning | Example |
|---|---|---|
| C | Note name | Find a C key |
| 1 | Finger, when marked as fingering | Use the thumb |
| C4 | Note and octave | A particular C, not finger 4 |
Before playing a new line, read its pitches once without moving your hand. Then read the finger numbers separately. This simple separation makes an ambiguous passage easier to diagnose. If the pitch is wrong, more finger repetitions may not help: you may have misunderstood the note rather than the movement.
Start with five notes under five fingers
Find two neighbouring black keys. C is the white key immediately to their left. Locate a C that gives your hand room to reach the next four white keys comfortably. Put the thumb over C, index over D, middle over E, ring over F and little finger over G. You are setting a starting position, not establishing a rule for the entire instrument.
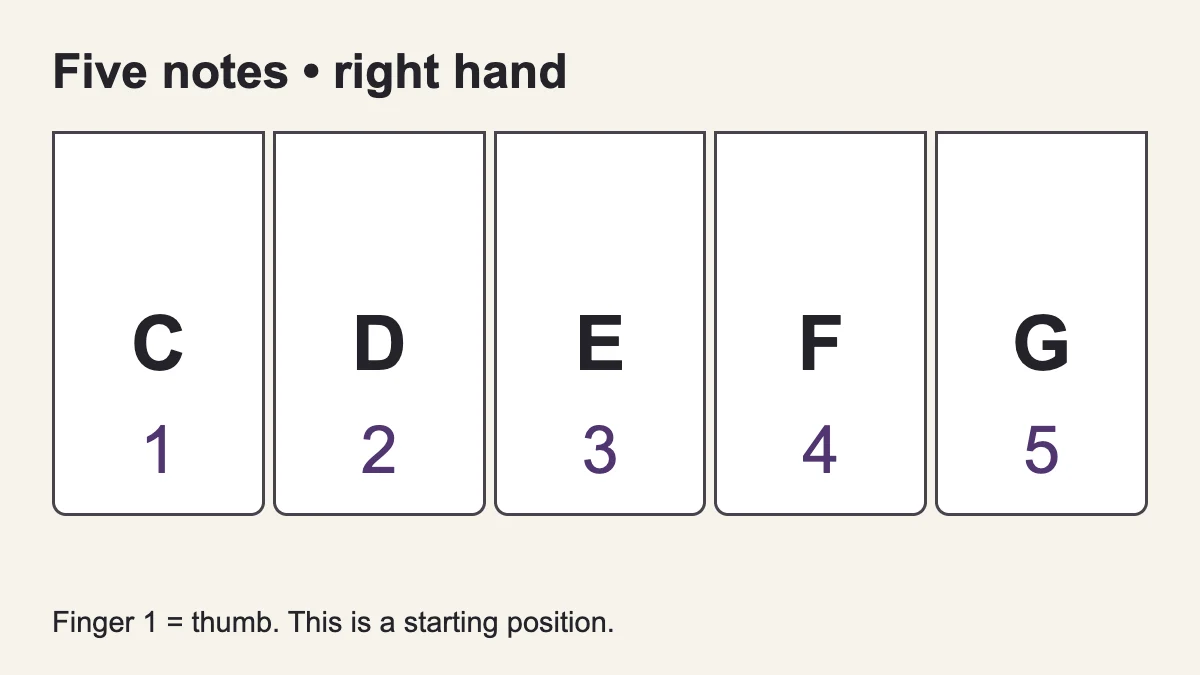
Use a stable setup that lets you see the keyboard without holding an awkward angle. Some players begin with a tube and a supported instrument; others play while holding the melodica. Follow the instrument’s instructions and choose a setup in which the hand can move freely. If the instrument slides away each time you press a key, solve that support problem before judging your fingering.
Play C–D–E–F–G slowly with 1–2–3–4–5, then return G–F–E–D–C with 5–4–3–2–1. Listen for unintended overlapping notes. Release the previous key deliberately when the exercise calls for separate notes. Do not press harder to compensate for uncertainty about the next finger. Pause and identify the next destination instead.
This five-note exercise does not require a thumb crossing. It is useful precisely because the hand can stay in one small area. If you add A, B and the next C, however, the original five-finger allocation no longer describes the whole journey. That is a different exercise with a different fingering plan.
A full C major scale needs a change of position
A common right-hand fingering for one ascending octave of C major is C–D–E–F–G–A–B–C with fingers 1–2–3–1–2–3–4–5. The thumb takes F after the middle finger plays E. This creates room for the remaining fingers to continue upward. It is a practical starting option, not the only possible fingering in every musical context.
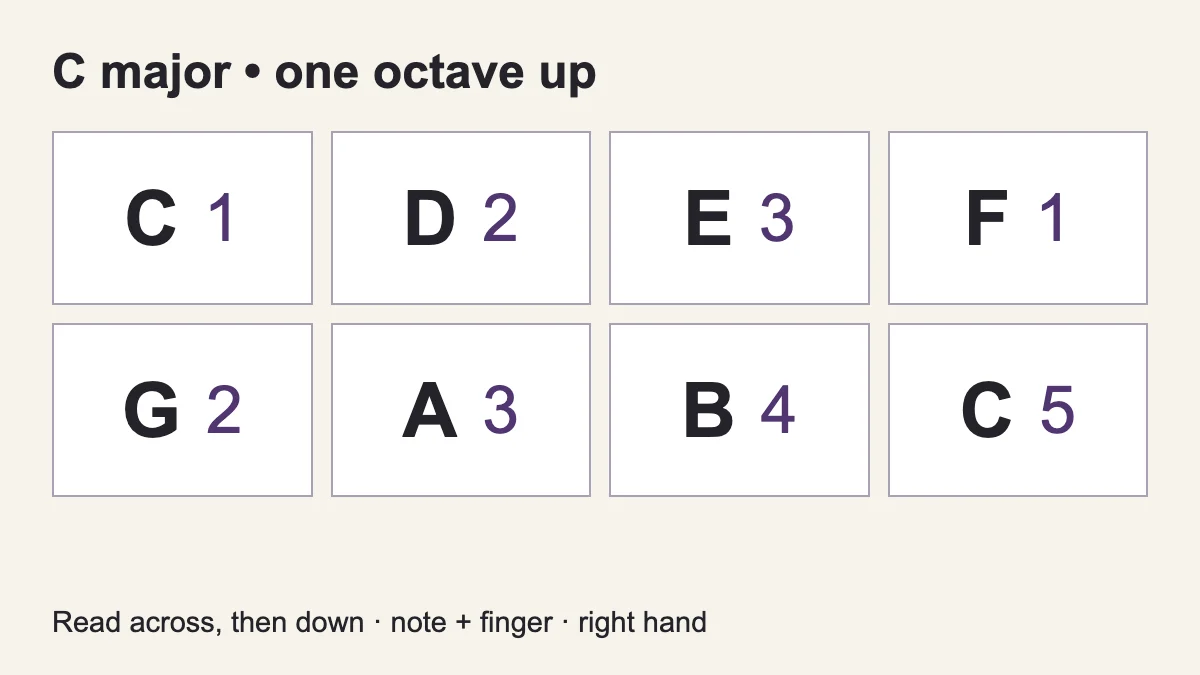
Descending through the same octave reverses that plan: C–B–A–G–F–E–D–C with 5–4–3–2–1–3–2–1. The important place to inspect is F–E, where the hand moves from thumb to middle finger. Do not assume the return will become automatic because the ascent went well. Practise each direction as its own small task.
| Direction | Notes | Fingers |
|---|---|---|
| Up | C D E F G A B C | 1 2 3 1 2 3 4 5 |
| Down | C B A G F E D C | 5 4 3 2 1 3 2 1 |
Start by playing only E–F–G with 3–1–2. Watch where the thumb needs to arrive, and allow the hand to follow the direction of the phrase. Then practise G–F–E with 2–1–3. Keep the motion unhurried and small enough to control. If it feels strained, stop and reconsider your instrument position or ask a teacher to observe it.
Once those transitions are comfortable, add one note on either side. D–E–F–G–A is a more informative checkpoint than repeatedly running the complete scale at a speed that hides the problem. Finally connect the whole octave, first without a metronome and then with a slow, steady reference if that helps.
Use short patterns to test the plan
The following patterns are original practice prompts, not extracts from songs. Play one note per comfortable beat at first. Their purpose is to reveal a specific movement or listening problem. A clean, unhurried attempt is more useful than many fast repetitions with a different mistake each time.
Pattern A: return to the starting note
Play C–E–D–G–E–C with 1–3–2–5–3–1. The hand remains in the C-to-G position, but the notes do not simply move one key at a time. Before playing, point to each destination. Then perform the line once and ask whether the jump to G changed your timing. If it did, practise D–G–E alone.
Pattern B: repeated notes without losing your place
Play D–D–E–F–E–D with 2–2–3–4–3–2 from the same five-note position. Release the D key between its two attacks. Notice whether you accidentally hold the first D while preparing E. Separate the two repeated notes clearly before trying to make the phrase smoother.
Pattern C: work across the position change
Play D–E–F–G–F–E–D with 2–3–1–2–1–3–2, using the scale plan above. This example crosses the transition in both directions. If you hesitate only on the return, work on G–F–E rather than blaming the whole scale. The written sequence gives you a precise place to check.
Pattern D: move the whole five-note position
Move to G–A–B–C–D and assign 1–2–3–4–5 again. These are five different notes under the same finger pattern. Play G–B–A–D–B–G with 1–3–2–5–3–1. Compare it with Pattern A. Your thumb now plays G, which demonstrates why finger 1 cannot mean C permanently.
When moving a pattern to another starting note, check the actual pitches rather than copying only the white-key shape. Some scales require black keys. Moving a major pattern to D, for example, requires attention to F-sharp. Our guide to sharps and flats explains how those names relate to keyboard positions.
Plan the phrase, not just its first note
Look at the highest and lowest notes before deciding where to put your hand. A phrase contained within C–G may work in the five-note position. A phrase that rises past G needs another plan. Choosing a comfortable first finger without checking the end can leave you stretching for the final note.
Next, look for a repeated note, a rest or a break between phrases. Such places may allow a position change without interrupting a connected line. That does not mean you must move there. It means you can compare options using the actual rhythm instead of treating the pitches as an endless, evenly spaced scale.
Mark only the fingers that help you remember a decision. At first you may want every number. Later, marking the first note and a difficult transition may be enough. The goal is to understand the route so you can read the music, not to become dependent on a second line of numbers underneath it.
Black keys do not have a universal finger rule
You may encounter advice such as “never use the thumb on a black key.” Treat absolute rules cautiously. Useful fingering depends on the neighbouring notes, the phrase, the hand and the instrument’s playing position. For a beginner, a teacher’s suggested fingering is a good starting point, but its purpose should be understandable.
Try a slow C–C-sharp–D comparison to locate the keys before adding any complex phrase. Decide on fingers for that short passage, repeat the same choice, and notice whether the hand remains comfortable. Do not turn an experiment that works for three notes into a claim that every chromatic passage should use the same sequence.
Diagnose the movement before adding speed
| Observation | Likely task to inspect | Next attempt |
|---|---|---|
| The same wrong pitch repeats | Note identification or starting position | Point to the keys without playing |
| A pause appears at E–F | Position change in the octave exercise | Play only E–F–G slowly |
| Two notes sound unintentionally | Release of the previous key | Separate neighbouring notes deliberately |
| The last note is a stretch | The phrase extends beyond the starting position | Plan the entire range before restarting |
| Finger numbers change on every attempt | No settled plan yet | Write one option and compare consistent attempts |
A weak or interrupted sound is not always a fingering error. A physical melodica also depends on airflow, and the instrument itself may need attention according to its manual. Separate pitch choice, finger movement, note length and sound production when describing the problem. “The second note starts late” gives you something more useful to work on than “I am bad at melodica.”
Build a short, repeatable practice session
Use this ten-minute outline as an adjustable example, not a required dosage or a promise of results. Spend two minutes locating notes and setting the hand. Spend three on one fixed-position pattern, three on a position change, and the remaining two connecting a short phrase and writing down what happened. Take breaks whenever needed.
For the first few sessions, keep the same narrow goal. You might choose “return from F to E without stopping” rather than “learn the melodica.” Record the pattern, the fingering and one observation. If you use a tempo, write it with the beat unit or count you followed. A bare number can be misleading when you later change the rhythmic subdivision.
Increase the challenge only when you can reproduce the movement comfortably. You can add a note, vary the rhythm or move to another register before increasing speed. Change one thing at a time. Otherwise you will not know whether a new problem comes from the fingering, the new pitches or the faster tempo.
Use the web tool for hearing, the instrument for touch
The online melodica is useful for checking whether a phrase rises or falls and for comparing nearby pitches. Its computer shortcuts and touchscreen controls are different from a physical keyboard. Do not judge your real-instrument technique by how quickly you can type a pattern on a laptop.
Likewise, borrowing a piano fingering idea does not make the two instruments identical. A melodica adds breath-driven sound production and a different playing position. Read the melodica and piano comparison if you are transferring from one to the other. Keep the shared keyboard knowledge, but check the physical details again.
Common questions about melodica fingering
Should I play everything with one finger?
One finger can help you locate a pitch briefly, but it gives you little preparation for connected passages. Begin with a small, comfortable multi-finger pattern and learn when the hand needs to move. You do not need to force a full octave into your first session.
Is 1–2–3–4–5 wrong for C–D–E–F–G?
No. It is a useful five-note position. The 1–2–3–1–2–3–4–5 sequence solves a different problem: continuing through a full octave. Choose a plan for the actual phrase rather than looking for one sequence that fits everything.
Will these exercises teach me songs by ear?
They address finger planning. Finding a melody by ear also requires listening, remembering pitches and checking intervals. Work on those skills separately, then combine them in a short phrase. Finger speed alone does not demonstrate musical hearing.
Sources and exercise notes
The right-hand octave option was checked against the educator’s Melodica World fingering explanation. The practice patterns, troubleshooting table and session outline above are KulakApp’s own teaching examples, not copied music or a certified curriculum. No third-party recordings or keyboard photographs are used.
A focused next exercise
Find the melodica note names · Play three short original melodies