Virtual Kalimba: Play a 17-Key Thumb Piano Online
Tap a tine to hear a note, find the low C in the centre, and follow a melody outward with alternating sides. This virtual kalimba uses a 17-note C-major layout and a light, synthesized plucked tone. It is a free browser tool for exploring note positions and short patterns, not a recording of a particular kalimba or a complete replacement for playing one.
Play the kalimba
Original synthesized sound. No microphone. Select a labelled note; these controls are not physical fingering instructions.
Loading the instrument…
The long row scrolls horizontally on narrow screens so that each tine remains large enough to select. You can also use Tab to enter the instrument, arrow keys to move among its buttons, and Enter or Space to play. No microphone, account, or installation is needed for this tool.
Find the centre before following a melody
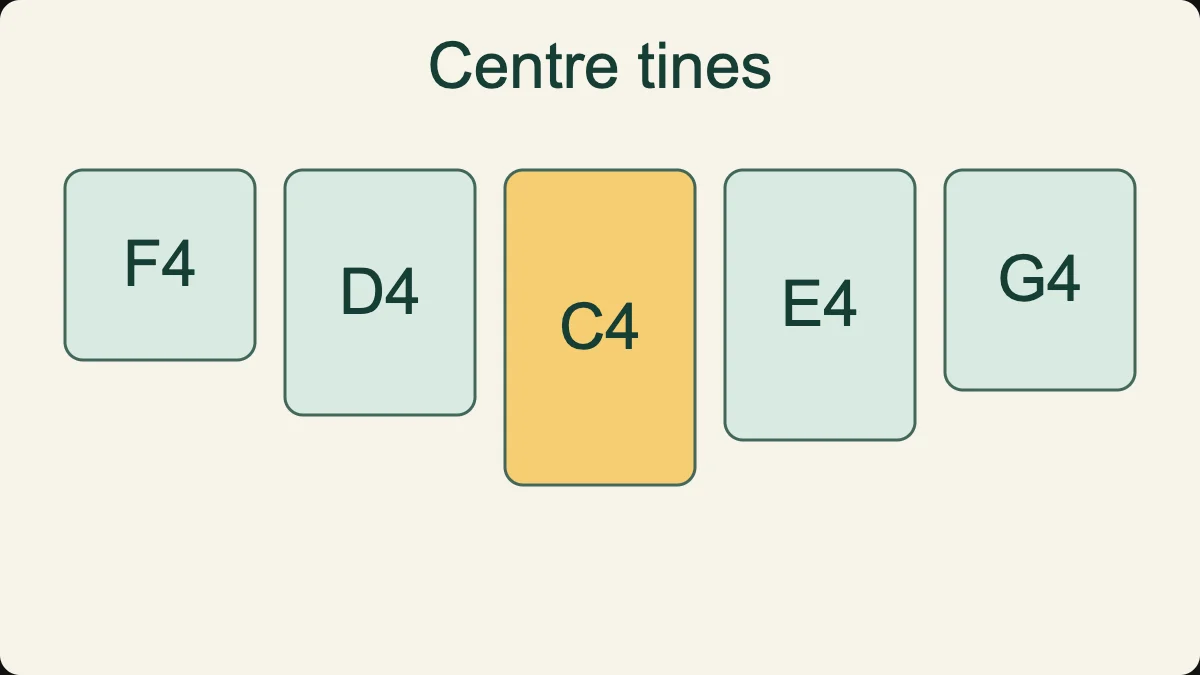
The lowest note is C4, near the centre of the instrument. The next note in the ascending scale, D4, is to its left. E4 is to its right. The scale continues by alternating sides as you move outward: F4 to the left, G4 to the right, A4 to the left, and B4 to the right. The visual order is therefore not the same as a piano keyboard.
Start by playing C4, D4, and E4 slowly. Look at the labels instead of assuming that “higher” means “the next tine to the right.” That assumption works for a simple piano keyboard but not for this alternating kalimba layout. Once you recognise the first three notes, return to C4 and repeat the sequence without scanning every tine.
The screen is arranged as if you were looking at the front of the instrument in playing position. A diagram photographed from another direction can appear reversed. If you compare this page with your own kalimba, check its labels and orientation rather than copying a left–right movement automatically. Physical instruments also come in different tunings and note counts.
This page uses one specified layout, not a universal rule for every thumb piano. Kalimba Magic’s discussion of different 17-note kalimba tunings illustrates why the tuning needs to be identified. Here, C-major means the available pitch collection is the natural notes C, D, E, F, G, A, and B across the displayed register.
The complete left-to-right order
Reading the virtual tines from left to right gives D6, B5, G5, E5, C5, A4, F4, D4, C4, E4, G4, B4, D5, F5, A5, C6, and E6. That sequence looks unusual until you separate the two sides. Each side contains every other note of the ascending diatonic pattern, and the centre supplies the lowest starting point.
You do not need to memorise all seventeen positions at once. Begin with the centre and the two tines beside it. Add the next note on each side only when you can find the earlier notes without hesitation. A compact practice area is easier to hear and easier to navigate than a melody that jumps across the entire screen.
On mobile, scroll the instrument area when you need the outer tines. The text should not become a tiny full-width image just to fit every note at once. You can read the article normally outside the tine area. If a scroll gesture triggers an unwanted sound, use Stop sound and begin again with a deliberate tap rather than a long swipe.
Connect letter names, scale degrees, and octaves
In C major, the seven scale degrees can be labelled 1 through 7: C is 1, D is 2, E is 3, F is 4, G is 5, A is 6, and B is 7. That numbering is useful for recognising a pattern such as 1–3–5. On this page, the visible buttons use letter names with octave numbers so that the actual pitch is unambiguous.
C4 and C5 are not the same sounding note even though both can be described as degree1 in different octaves. Some kalimba notation uses dots or other marks to distinguish registers. Always read the notation key supplied with a particular arrangement. A plain “1” without an octave convention may not tell you which C the writer intended.
Try C4–E4–G4 and then C5–E5–G5. The relative shape is the same, but the second group is an octave higher. The physical screen locations differ because the layout alternates. This is a useful bridge between recognising a musical relationship and finding that relationship on a specific instrument.
A numeric pattern is not automatically portable to every kalimba. The starting key, tuning, available notes, and octave range all matter. If a pattern requires a sharp or flat that is absent from this C-major map, the missing note cannot be produced by pressing harder. You need a different arrangement, a different tuning, or another tool with chromatic notes.
Understand the plucked sound and its limits
Each tap starts a short attack followed by a fading tone. You do not need to keep holding the button to sustain the note. The sound is generated by the browser using a small group of frequencies with different strengths. It is designed to suggest a plucked metal tine without downloading a sample library or requesting microphone access.
A physical kalimba responds to how and where a tine is plucked, its construction, resonance, and tuning. This electronic model does not reproduce every buzz, body resonance, or difference between individual tines. The same note receives a consistent sound here, which is useful for comparing pitches but less expressive than a real instrument.
The ringing tail can make consecutive notes overlap. That is part of the plucked character, but too much overlap may hide the order of a fast pattern. Slow down or use Stop sound between comparisons. A quiet, clear pair of notes is more useful for listening than a louder cloud of many notes started at once.
The tool limits simultaneous electronic voices so that repeated tapping cannot build up indefinitely. This is a performance safeguard, not a musical rule. You can still make small combinations, but the page is intended for short note exploration rather than a complex arrangement with many independent parts.
Play a short pattern without needing a song
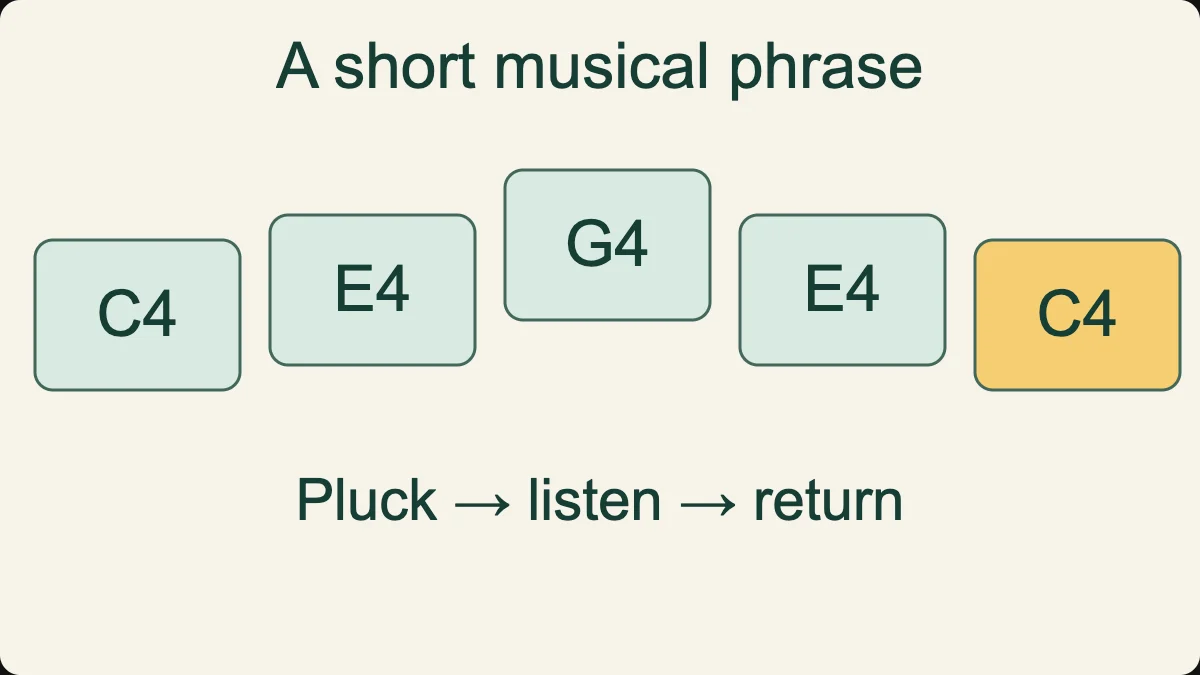
Start with C4–D4–E4–D4–C4. The melody goes up, turns, and returns. On the alternating layout, your movement changes sides several times. Keep each tap separate and let the final C4 ring. The point is to connect the audible direction of the melody with the location of its notes.
Before repeating, say the letter names once. Then play the sequence while looking mainly at the centre area. If you select F4 when you meant E4, stop and compare those two labels. The mistake may be a location error rather than a failure to hear the note. Separating navigation from listening helps you choose the right practice task.
Now try C4–E4–G4–E4–C4. The notes skip within the scale rather than moving to every neighbour. Because E4 and G4 lie on the same side of the centre, the hand movement feels different. Listen to the wider shape as well as noticing the layout. A kalimba pattern can be mechanically convenient without being musically identical to another convenient pattern.
Make an answer to your first phrase
Use C4–D4–E4 as a short question and E4–D4–C4 as its answer. Leave a pause between them. The answer reverses the direction and returns to the starting note. You are not performing a known song; you are building an original miniature phrase with a clear relationship between its two halves.
Change the answer to G4–E4–C4. The ending is the same, but the route is wider. Play both answers at the same pace so that the difference comes mainly from pitch. If you also change the rhythm, the comparison becomes less controlled, and you may not know which change caught your attention.
Write your favourite version using letters and octave numbers. That little record is enough to reproduce it later. There is no need to call it a finished composition or share it publicly. The useful result is that you made a musical choice, remembered it, and can hear the difference when you alter it.
Hear intervals before stacking many notes
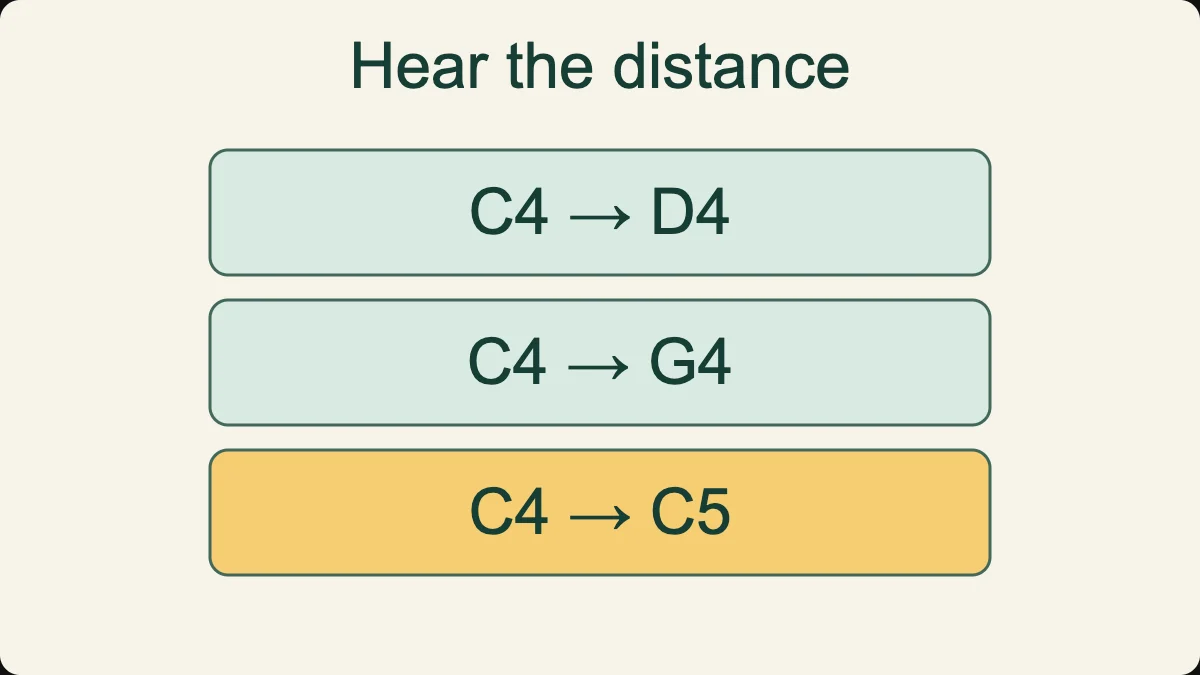
Compare C4–D4 with C4–G4. The first movement is close; the second is wider. Keep C4 as your reference and repeat the examples in another order. Ask which destination is farther from the reference. You can make that judgement before memorising the formal name of every interval.
Then try C4–E4 and C4–F4. These are different distances, even though their destination buttons sit on opposite sides near the centre. The screen’s left–right geometry does not measure musical distance. The pitch labels and the sound are the relevant evidence.
For an octave, compare C4 with C5. They share a note letter in different registers. In this equal-tempered model, the higher pitch has twice the frequency of the lower pitch. That relationship concerns pitch, not volume or duration. Play both gently and let each fade before making another comparison.
Try a simple broken chord
C4, E4, and G4 form the pitch collection of a C-major triad. Play them one after another as C4–E4–G4–E4. This is a broken-chord pattern: the notes are presented in sequence rather than all beginning together. You can hear the connection between the notes without needing to coordinate several fingers at once.
Allow a little ringing overlap, then repeat with Stop sound between each pitch. The separated version makes individual notes clearer; the overlapping version lets you hear more of their combined colour. Neither version proves that one technique is always better. They answer different listening questions.
Do not assume every three adjacent screen tines forms the same chord shape. This layout alternates scale notes, and the centre interrupts the left-to-right pattern. Check the actual labels. Knowing the intended pitches gives you a reliable way to verify a combination instead of relying on a shape that only sometimes works.
Keep the pulse while the tines continue ringing
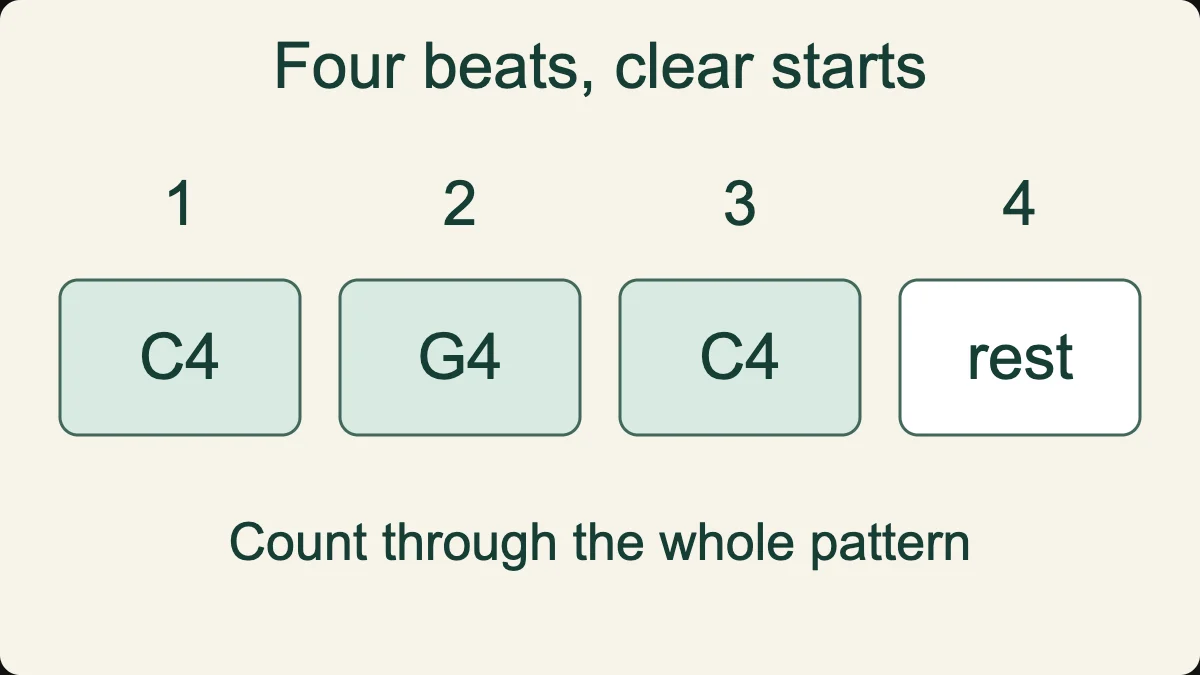
A note’s sound can continue after the moment you tap it. Your next tap still needs a deliberate position in time. Choose C4 and G4, then alternate them against a comfortable pulse. Listen for the starts of the notes rather than waiting for each previous sound to disappear completely.
Use the online metronome when you want an external beat. Begin with one tap per click. After a stable repetition, leave every fourth click silent. Count that beat internally while the previous note fades. The silence belongs to the rhythm even when a tail remains audible.
Now play two evenly spaced taps during one beat, followed by a beat with one tap. If the pair becomes rushed, return to one tap per beat and say the subdivisions before playing them. A faster surface rhythm is only useful when its spacing remains clear.
Use the listening exercise as a small check
Listen and repeat plays three notes and then asks you to select them in order. Wait for the “Your turn” message before responding. The comparison checks the pitches you selected, not the strength or timing of a physical pluck. It does not listen to an external kalimba because this tool has no microphone input.
If you match only part of the sequence, isolate the first movement. Did it rise or fall? Did it pass over a scale note? Listen again with that one question in mind. If you can hear the pattern but cannot find the tines quickly, locate the possible notes before the next attempt and reduce the navigation burden.
The example is fixed and short. Repeated success may reflect familiarity with that example, so it is not a general score for your ear. For a different challenge, try interval ear training or the music ear test. Choose the task that matches the skill you want to practise rather than treating every score as interchangeable.
A practice routine for a five-minute visit
Use the first minute to locate C4, D4, and E4 and to check a comfortable volume. Use the next minute to play the five-note rising-and-returning pattern. In the third minute, change just one note and compare the result. In the fourth, alternate C4 and G4 with a steady pulse. Finish with the three-note listening exercise and one written observation.
This is a suggested structure, not a promise of progress in five minutes. Spend longer on a useful difficulty and stop if you are simply repeating without listening. A session can be shorter and still be purposeful. What matters is whether you can say what you tested and what you noticed.
On another day, move the same idea to a higher register. Compare C4–E4–G4 with C5–E5–G5, checking the labels before you start. The relationship remains recognisable while the screen positions and sound register change. This tests whether you understand the pattern beyond one familiar group of tines.
If you own a kalimba, compare the tuning printed on it with this page before transferring a phrase. A different key or note count may require changes. Do not force a physical tine or alter its tuning solely because a browser diagram looks different. Use instrument-specific guidance for adjustment and maintenance.
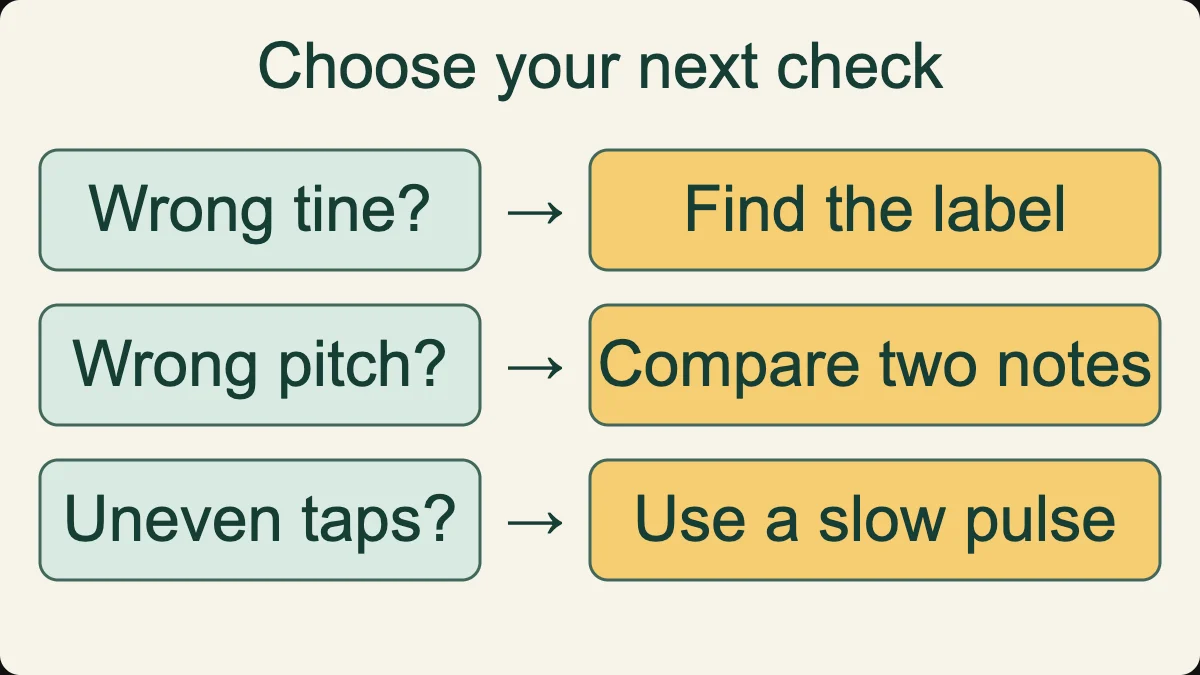
Common problems and useful checks
Distinguish a wrong location from a wrong musical idea
Suppose you intend to play C4–E4–G4 but select F4 in the middle. There are two different questions to ask. Did you imagine E4 and touch the wrong tine, or did you intend the sound of F4 because you had not yet heard the difference? For the first problem, practise locating E4 without a time limit. For the second, alternate C4–E4 and C4–F4 with a pause between the pairs. Different problems deserve different exercises.
You can make the same distinction with rhythm. If you know exactly where the next tap belongs but your finger is still searching for the note, simplify the note collection. If your finger is ready but you are unsure when to play, keep the note fixed and practise the rhythm alone. Combining both tasks too early can make every attempt feel generally wrong without revealing the cause.
A short written log might have three columns: intended pattern, what actually happened, and next check. For example: “C–E–G; found E late; locate C, E, and G before starting.” Another entry could be “four equal taps; final tap rushed; repeat on C only with a metronome.” Neither entry requires a judgement about your ability. Both point to a concrete action you can try immediately.
After the correction, return to the original pattern once. If it is clearer, stop rather than adding several new difficulties at the same time. If it is not clearer, reduce the task again. A virtual instrument is convenient because a small experiment costs very little effort: you can test two notes, compare one change, and decide whether it helped before committing to a longer practice session.
This approach also makes a physical kalimba session more focused. The browser can help you identify the notes and timing you intend, while the real instrument introduces the separate work of touch, tone, and comfortable movement. Keep those roles distinct so that success on one does not become an exaggerated claim about the other.
If sound does not begin, tap one tine and check whether the browser tab or device output is muted. Audio may need an initial user action. If headphones are connected, confirm that they are the selected output. The on-page volume control changes only this instrument and cannot override a muted system.
If the wrong tine sounds on mobile, slow the movement and scroll to centre the area you need before playing. The horizontal instrument strip is deliberately wider than a small phone so that the individual targets remain usable. You do not need to reach every outer note for the beginner patterns described here.
If overlapping tones make an exercise hard to follow, use Stop sound and try fewer notes. A kalimba-like decay is pleasant for some patterns but can obscure a comparison when too many notes are ringing. You can practise direction with two cleanly separated notes before returning to a longer phrase.
If playback feels delayed, compare your wireless output with the device speaker or a wired connection at a comfortable level. Close other demanding tabs if necessary. The browser tool is not dedicated audio hardware, and device delay should not be mistaken for a weakness in your sense of rhythm.
Questions about the virtual kalimba
Is this a standard 17-key kalimba?
It uses a common 17-note C-major alternating layout, with C4 in the centre and a range ending at E6. Other physical kalimbas have different keys, arrangements, or note counts. Match the tuning before applying a pattern from one instrument to another.
Are the sounds recorded from a real thumb piano?
No. The tone is original browser synthesis with a plucked attack and fading tail. It is useful for hearing note relationships and short patterns, but it does not claim to reproduce a specific kalimba’s resonance or a performer’s touch.
Why does the scale alternate left and right?
The centre contains the lowest note, and successive scale notes alternate sides outward. This is why the next higher note is not always the next button to the right. Follow the note labels until the layout becomes familiar.
Can I play sharps and flats?
This version contains the natural notes of C major only. It does not offer every chromatic pitch. If a phrase needs an unavailable note, choose a suitable arrangement or use a chromatic tool such as the virtual piano. Pressing harder will not create a missing pitch.
Does the site record what I play?
This tool does not record microphone audio or upload a performance. Its short listening task compares your selected pitches locally. Site analytics, where you consent to them, are governed by the site’s separate privacy controls rather than by microphone access.
How can I continue after free exploration?
Use the note-reading test to connect pitch names with notation, or explore KulakApp for structured listening practice and progress tracking. The mobile application is not being described as a kalimba simulator. Pick a next step based on the difficulty you actually noticed.
A useful last check is to close your eyes after playing C4, imagine a higher note, and choose the note you intended. Open your eyes to verify the label. The result is a small connection between hearing, intention, and action—not a claim about talent. Build from that clear connection rather than from a longer list of buttons.