Virtual Glockenspiel: Play Bell-Like Notes Online
Tap a labelled bar to hear a bright, ringing note. This virtual glockenspiel gives you a small chromatic range for trying melodies, comparing pitches, and exploring how sounds overlap. It uses original synthesized audio rather than recordings of a physical instrument. You do not need an account, a microphone, or a music keyboard to begin.
Play the glockenspiel
Original synthesized sound. No microphone. Select a labelled note; these controls are not physical fingering instructions.
Loading the instrument…
The available notes run from C6 to C7. These labels describe the pitches that sound, not a convention for writing an orchestral part. Start quietly: the register is high, and turning up the volume is not a useful substitute for listening carefully. The Stop sound button lets you clear the ringing notes whenever you want a fresh comparison.
Start with a note, a pause, and another note
Play C6 once. Listen beyond the initial strike, noticing the quieter sound that follows. Wait for it to fade before playing D6. Your first task is simply to separate the beginning of each note from its tail. That distinction becomes important when several bell-like notes sound close together.
Next play C6 twice, leaving a shorter gap. You should hear two starts even though the first sound may still be fading. Now play C6 followed by E6. The pitch changes as well as the timing. Keep the two experiments separate so that you know which difference you are listening for.
Use a comfortable listening level throughout. A high sound can feel prominent without needing much volume. If the tone is uncomfortable, reduce the page volume or your device volume, stop, and choose another activity. There is no requirement to work through discomfort to complete this exercise.
On a phone, tap near the centre of a bar. On a computer, click it or use the keyboard controls. Tab reaches the instrument; arrow keys move between note buttons, and Enter or Space plays the focused note. Escape stops the sound. Keyboard activation starts a struck note rather than a continuously held tone.
Find your way around the octave
The natural-note landmarks are C6, D6, E6, F6, G6, A6, B6, and C7. Between some of them are sharp-labelled buttons. Together they form thirteen chromatic choices, including both ends of the octave. You can reach every displayed note without changing tuning or choosing a different instrument mode.
Read the names rather than relying on colours or screen position alone. The arrangement changes to fit a small screen, so a row break is a layout decision, not a new musical boundary. After B6 comes C7 even if those buttons happen to appear on different rows on your phone.
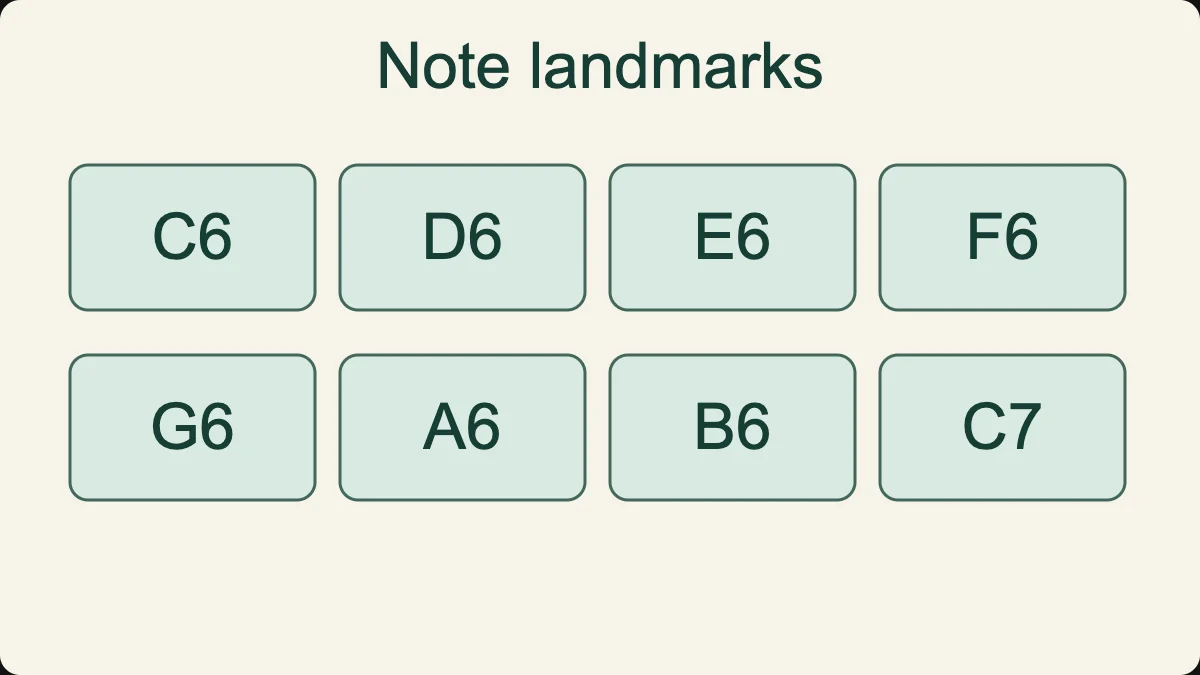
The octave number matters. C6 and C7 share a letter name, but C7 is an octave higher. Saying only “play C” leaves two possible choices in this tool. When copying an example from the guide, keep the number until you are sure which register the example uses.
Try finding C6, G6, and C7 without playing. Then sound them one at a time. This separates navigation from listening: if you cannot find a label, the immediate problem is the map; if you find it but confuse its sound with another, a comparison exercise is more useful.
| Note | Use in a short exercise | What to notice |
|---|---|---|
| C6 | A consistent starting reference | Return here between comparisons |
| E6 | The middle pitch of a C-major broken chord | It is farther from C6 than D6 is |
| G6 | A wider upward movement from C6 | Keep the gap between strikes steady |
| C7 | The upper octave boundary | Same letter, different register |
Sharps are extra pitch choices, not louder notes
C sharp sits a semitone above C, while D sits a whole tone above C in this model. Play C6–C sharp6 and then C6–D6. Use the same volume and approximately the same spacing. Listen for the difference in distance rather than trying to decide which pair is more dramatic.
The sharp sign does not tell you to strike harder. It changes the pitch being selected. Likewise, a natural note is not automatically softer or easier than a sharp note. Those misunderstandings can make a simple button layout feel more complicated than it needs to be.
This interface uses sharp spellings for compact labels. In equal temperament, some pitches can also be written with flat names, depending on musical context. A score may therefore name a pitch differently from the button that produces it. Check the pitch relationship instead of assuming that a missing spelling means a missing sound.
There is no separate sharp button between E6 and F6 or between B6 and C7. Those adjacent natural notes are already a semitone apart. Move through the displayed sequence slowly and compare those two gaps with C6–D6. The written alphabet alone does not show equal distances.
Letting notes ring changes what you hear
A struck sound has an onset followed by decay. In this tool, holding a finger on a bar does not keep supplying energy to the note. To hear another strike, activate the bar again. This behaviour differs from the held-tone controls used by a wind-like or bowed instrument model.
Play C6, then E6 before C6 has completely faded. You may hear an overlap rather than two isolated sounds. Repeat the pair with more space between strikes. The pitches have not changed, but the relationship is easier to inspect when the first tail does not mask the second onset.
Neither version is inherently wrong. Overlap can be part of a musical texture, while separation can help you identify a pitch. Choose the spacing to suit the task. When comparing intervals, a clear start and a repeatable gap usually make the experiment easier to understand.
Stop sound clears the active tones. It is a practical reset, not a realistic lesson in acoustic damping technique. A physical glockenspiel responds to mallets, contact, construction, and the player’s actions in ways that this small synthesizer does not reproduce. The button should not be mistaken for a pedal or a particular hand movement.
Try a simple test: play C6, press Stop sound, and then play G6. Repeat without stopping in between. Notice whether the lingering first sound changes your impression of the second. Keep your description concrete, such as “the starts were clearer,” instead of turning the observation into a claim about talent.
Play an original rising-and-returning phrase
Begin with C6, D6, E6, D6, C6. Give each note a deliberate start. The phrase rises by steps, changes direction at E6, and returns to its starting pitch. It fits entirely within the lower part of the displayed range, so you can concentrate on the contour rather than travelling across every button.
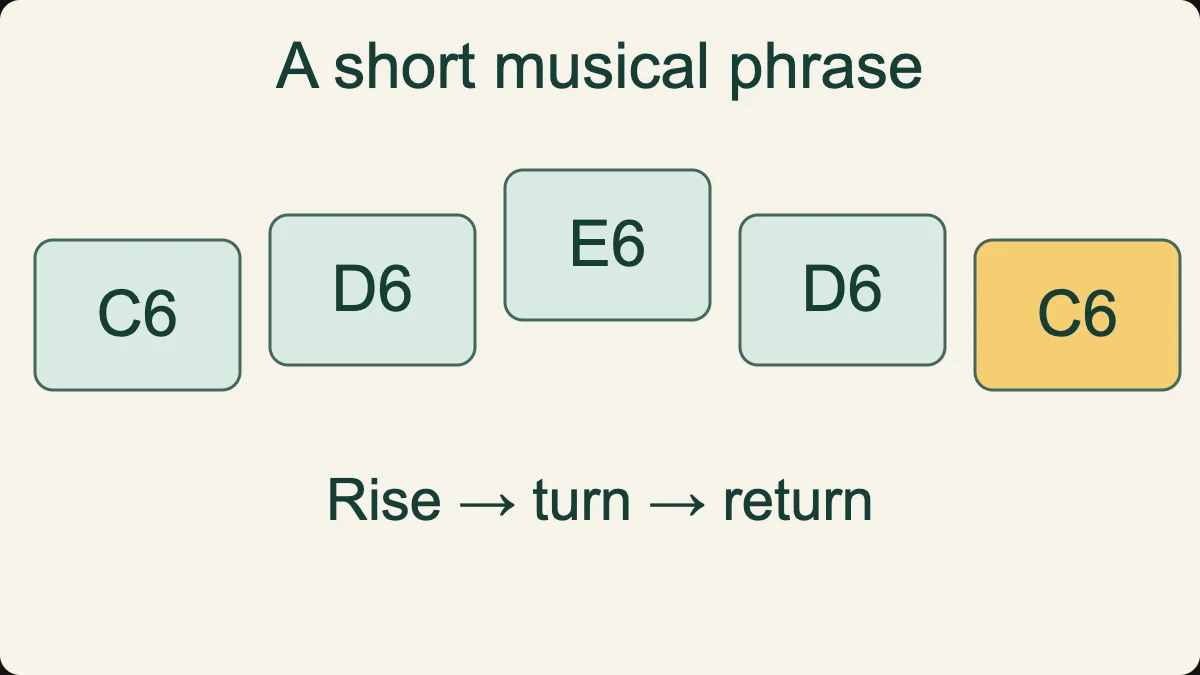
Before repeating, describe the shape without letter names: up, up, down, down. Then play the same notes again. Connecting the shape with the labels gives you two ways to remember the idea. If one note goes wrong, identify whether you lost the direction or selected the wrong button despite knowing it.
Make a second version using C6, E6, G6, E6, C6. This time the upward and downward movements are wider. Keep the same number of strikes and a similar pace. You are changing the pitch spacing while preserving the outline, which makes the difference between the two versions easier to hear.
Do not play both examples as quickly as possible. Start slowly enough that you can name the next note before activating it. After a few deliberate repetitions, look less often at the written sequence. If accuracy disappears, return to a smaller section rather than repeatedly rehearsing the same mistake.
These are original practice patterns, not arrangements of a familiar song. There is no hidden accompaniment, score download, or full-piece playback behind them. Their purpose is to give you a short idea that you can inspect, change, and reproduce using only the notes visible on the page.
Build a question and an answer with six strikes
Play C6–D6–E6 as a three-note question, then pause. Answer with E6–D6–C6. The answer reverses the direction and returns to the reference note. Allow enough space between the groups to make their boundary audible; otherwise the six notes may feel like one continuous run.
Next leave the question unchanged and answer with G6–E6–C6. Compare the two endings. Both arrive at C6, but they approach it through different distances. A useful observation might be that the second answer is harder to locate on the screen or that its first note is easier to remember by sound.
For a partner activity, one person chooses an answer and the other identifies which version was played. Agree on the two possibilities beforehand. This keeps the task manageable and makes a wrong response informative. It should be a listening comparison, not a guessing contest with an unlimited set of possibilities.
You can also write your own answer using three available notes. Play it several times at the same pace before evaluating it. Changing the rhythm, register, and pitch order at once makes comparison difficult. A small controlled change teaches more than a sequence that becomes different on every attempt.
Compare intervals without changing the reference
Use C6 as the first note of three pairs: C6–D6, C6–G6, and C6–C7. These are a major second, a perfect fifth, and an octave. Play each pair with the same spacing, and reset the ringing sound when needed. The stable first note gives your ear a common point of comparison.
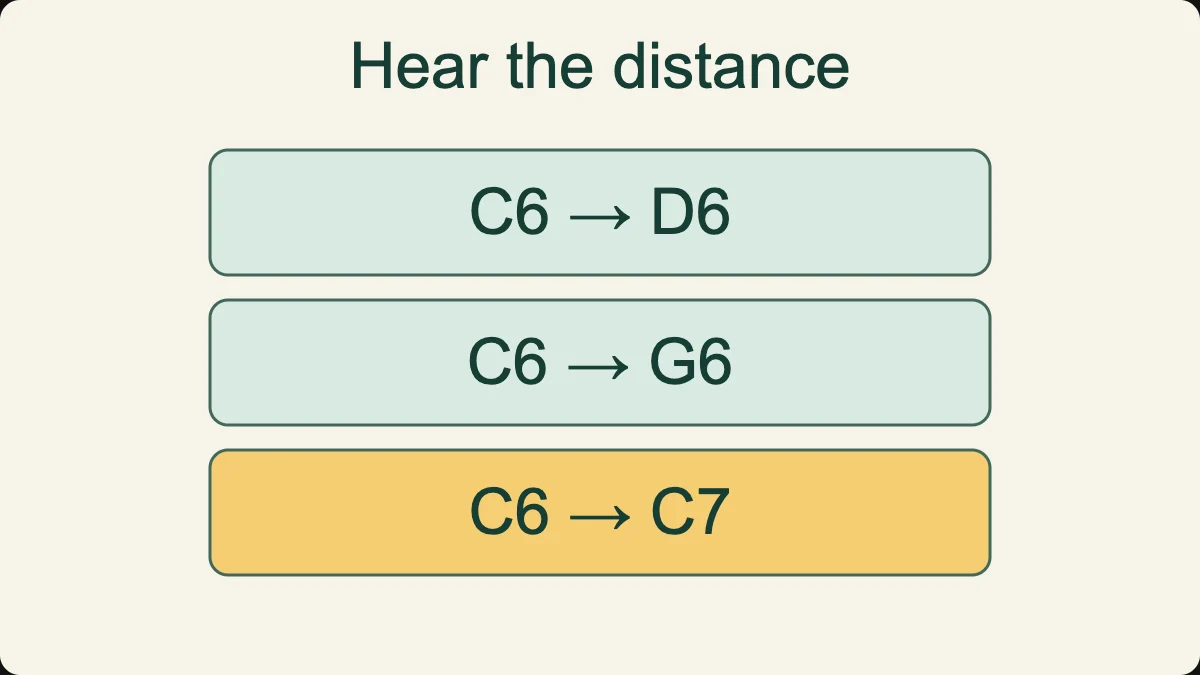
Ask which pair feels closest and which spans the widest distance. Then change the order of the examples. If you can only answer when the pairs always appear in the same order, you may be remembering the exercise sequence rather than comparing the sounds themselves.
Reverse the direction as well: D6–C6, G6–C6, and C7–C6. The distances remain the same, but the melodic direction changes. Work with just two pairs if three are difficult to keep separate. The page has no requirement to complete a particular number of comparisons in one session.
For another sound context, use the virtual piano. Be careful when comparing tools with different available registers. An interval can stay the same while every pitch moves higher or lower. Note both the distance and the starting register instead of assuming that a brighter sound means a wider interval.
The dedicated interval ear-training page provides a more focused next activity. Keep a result from that task separate from your ability to find glockenspiel buttons. Screen navigation, note naming, interval recognition, and physical instrumental technique are different things to practise.
Count rests even while the sound is fading
Count four steady beats. Strike C6 on the first beat, E6 on the second, G6 on the third, and do not strike on the fourth. Continue counting through that last beat. A rest in your action pattern means no new attack; it does not necessarily mean that every previous sound has already disappeared.
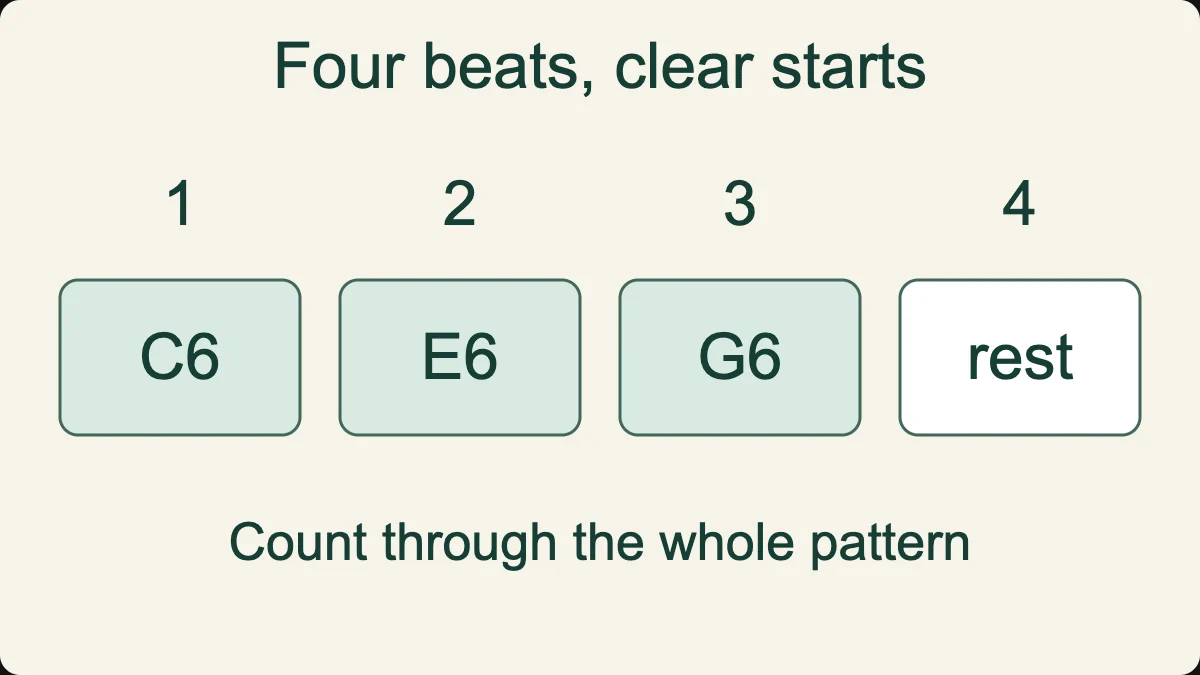
Repeat the pattern with Stop sound just before the fourth beat. Now compare a silent fourth beat with a fourth beat containing the previous note’s tail. The timing of the three attacks can remain identical even though the overall texture changes. This is a useful distinction when describing what went wrong in a rhythm exercise.
Move the rest to the second beat: C6, rest, E6, G6. Say the beat numbers aloud without skipping the empty position. If you accidentally shorten the pattern, practise four spoken counts before adding the notes again. Keeping time through a gap is part of the activity, not an interruption to it.
You can use the online metronome as a separate reference. Choose a pace that leaves time for accurate selection. If the click and the bell sound compete for your attention, reduce their volumes and simplify the phrase to one repeated note before restoring pitch changes.
Use the three-note listening exercise honestly
Listen and repeat plays a fixed three-note example. After the prompt says it is your turn, choose three notes in the same order. The result compares the selected pitches at each position. It does not record you, assess tapping precision, or listen to an acoustic instrument in your room.
A complete match means that the three choices matched this example. It is not evidence of perfect pitch or an overall music-ability score. Repeating a fixed pattern can improve your result because you remember it. That is useful practice, but it should not be described as a standardized progress measurement.
When a response is incorrect, listen again and divide the task into two movements: first note to second, then second to third. Decide whether each movement goes up or down before attaching names. After you understand the contour, use the labels to reproduce the pitches in the same register.
Stop sound also cancels the current exercise. This gives you a clear way to pause when you are distracted or when another sound interrupts. Starting over is preferable to treating a response made under different listening conditions as a meaningful comparison with an earlier attempt.
Choose the next exercise from the mistake
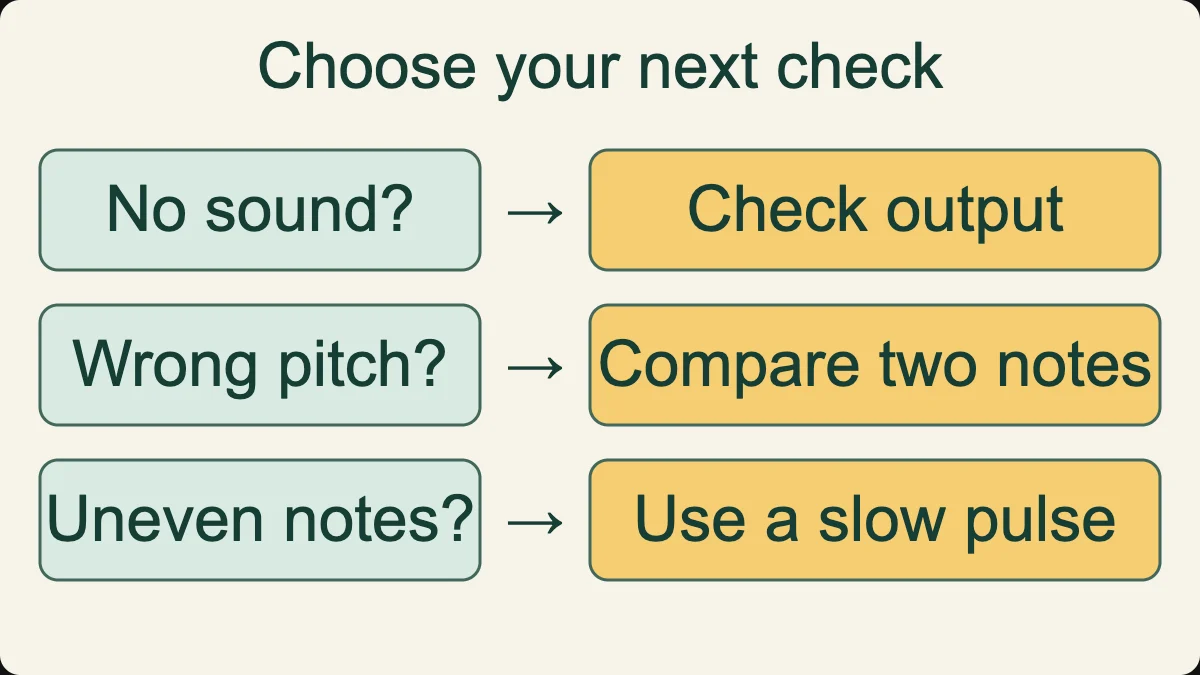
If you select the wrong bar while knowing the intended note, work on the layout. Find C6, E6, and G6 silently, then sound each one. Reduce the number of choices before increasing speed. Repeating the whole phrase faster is unlikely to solve a navigation problem.
If two pitches sound similar, compare only those two. Alternate them with an obvious pause and keep the volume constant. Then place them inside a three-note pattern with C6 as a reference. You are increasing the listening task gradually rather than asking your memory to handle a long sequence immediately.
If the attacks are uneven, choose one note and practise its timing alone. Restore a second pitch after the spacing is comfortable. This removes travel across the interface from the problem. The same principle can help when preparing a pattern to try later on a physical instrument.
A compact session might include four single-note strikes, two runs of the rising-and-returning phrase, two interval comparisons, and one four-beat pattern with a rest. Stop when you can name one specific improvement or unresolved difficulty. Adding more repetitions is not automatically more useful than understanding the last one.
What this model can and cannot teach
A physical glockenspiel belongs to the metal-bar family. Yamaha’s comparison of mallet instruments distinguishes it from wooden-bar instruments such as the xylophone. The sound here is a simplified bell-like synthesis, not a captured performance or a simulation of a particular manufacturer’s instrument.
The browser can help you explore note order, register, repeated attacks, and overlapping decay. It cannot show whether your mallet grip is comfortable, your stroke rebounds efficiently, or your posture suits a real instrument. Those questions require practical observation and appropriate instruction.
The displayed pitch names are also not a complete lesson in reading glockenspiel parts. Written and sounding registers must be understood in the context of the score being used. This page avoids that ambiguity by labelling the sounding notes directly. Do not transpose a printed part merely because its octave numbers look different from the screen.
Keep a useful record without turning practice into a score
Write down the exact task before describing its outcome. For example: “C6–E6–G6, one strike per count, followed by one count without a strike.” That description is reproducible. A note saying only “practised bells” gives you little basis for deciding what to repeat next time.
Then identify one observable detail. Perhaps you found G6 without searching, preserved the empty fourth beat, or heard the difference between C6–D6 and C6–G6. Avoid replacing that detail with a vague statement such as “my ear is much better.” A narrow observation is more honest and more useful for choosing your next task.
If you repeat the activity on another device, note that change as well. A smaller display, different output level, or wireless headphones can affect the experience. Comparing two attempts is easiest when their conditions are similar. A difficult attempt on an unfamiliar phone does not erase what you learned on a computer.
For a teacher-led activity, ask the learner to explain the change they made after a mistake. Did they leave more space, return to one reference pitch, or reduce the number of bars? Their explanation can reveal whether the next repetition is deliberate rather than another guess. Keep the discussion supportive and specific to the task.
On the next visit, begin with the same short pattern before introducing a new one. If the old task is comfortable, change just one element: move the rest, reverse the contour, or substitute G6 for E6. This creates a clear next step without requiring a long piece, a public leaderboard, or an exaggerated progress claim.
The tool does not save this practice record for you. Keep any notes in your own notebook and avoid entering personal information into unrelated feedback fields.
Questions about the online glockenspiel
Why does a note keep ringing after I release it?
The model uses a struck sound with a fading tail. Releasing the button does not damp it immediately. Use Stop sound for a clean reset, or wait before the next strike when you want to hear pitches separately.
Can I use a phone without a microphone?
Yes. Tap the note buttons to play. The tool does not need microphone permission and does not record sound. If you hear nothing, check the page volume, device output, and whether the browser tab has been muted.
Is this a full glockenspiel simulator?
No. It provides one chromatic octave and a short listening task using synthesized sound. It does not reproduce physical mallet technique, a complete concert range, a room, or a particular acoustic instrument.
Why is the sound late on my headphones?
Output latency can vary with the device and connection. Compare built-in speakers or wired headphones at a comfortable level before judging your timing. The tool does not measure or automatically correct your device’s audio delay.
What should I try after this?
Use the note-reading test for notation or the music ear test for another short listening task. KulakApp offers a route into structured ear-training practice; it is not being presented here as a physical glockenspiel tutor.