How to practise drums without a drum set
You can practise counting, rhythmic memory and basic coordination without owning a drum set. Start with a steady spoken count, add light alternating hand movements, then separate those movements from a simple foot pulse. A practice pad, a metronome and a virtual drum kit serve different purposes: none is a complete substitute for learning the touch and balance of a real set.
This guide gives you an equipment-free starting routine and explains when another tool becomes useful. You do not need to buy several accessories before trying it. Choose a quiet place, leave enough room to move comfortably and work on one observable task. The aim is not to imitate a concert performance on a table; it is to make the next practice session more deliberate.
Choose a skill that your setup can actually support
Not every drumming problem needs a loud instrument. You can identify where a note belongs in a count, remember a short pattern, read a simple rhythm grid or notice that your hands stop whenever your foot moves. Those are useful tasks even when the only available equipment is a chair and a timer.
Other details depend on physical feedback. A phone screen does not teach stick rebound. Tapping your shoe does not reproduce a bass drum pedal. Hearing a sampled snare does not tell you whether your own stroke produces an even sound. Keep those limits visible so that progress on a counting exercise is not mistaken for complete drum technique.
| Task | Useful starting setup | What remains untested |
|---|---|---|
| Keep track of four beats | Spoken count and metronome | Stick control and tone |
| Alternate two hands | Light taps on a suitable quiet surface | Real drum rebound |
| Hear kick and snare placement | Virtual drum sounds | Pedal and stick technique |
| Work on stick response | A suitable practice pad and instruction | Balance across a full kit |
| Coordinate a complete part | Access to a drum set | Playing with other musicians still needs practice |
First, make the pulse easy to follow
Say “one, two, three, four” at an unhurried, even pace. Repeat without leaving an extra gap between four and the next one. Each number marks one beat in this exercise. If you use our online metronome, begin with one click for each number. Choose a speed at which you can speak and move without rushing.
Listen to several clicks before joining in. Then count aloud for four cycles without tapping. This separates understanding the pulse from controlling your limbs. If the count itself is unstable, adding a complicated pattern gives you more moving parts without revealing the original problem.
Next say “one and two and three and four and,” keeping the numbered beats at the same speed. The word “and” sits halfway between neighbouring numbers. You have doubled the number of spoken positions, not doubled the tempo of the numbered beats. That distinction becomes important when you later compare quarter-note and eighth-note patterns.
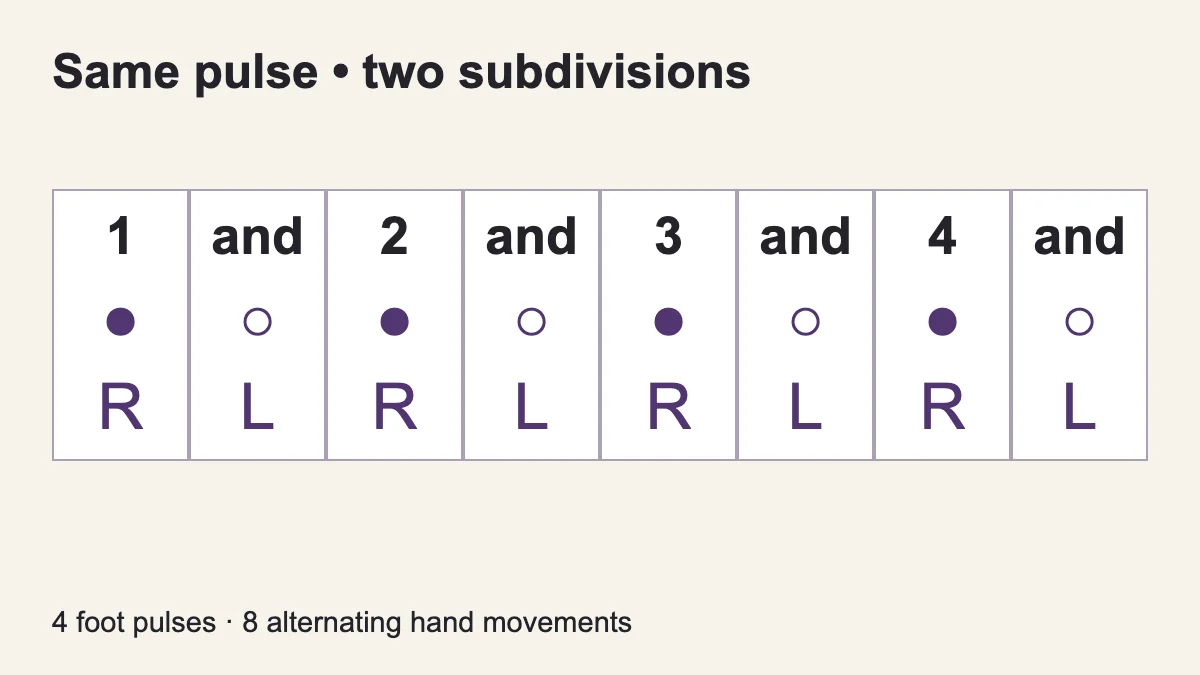
Try switching between the two counts while the metronome continues. Count only the numbers for one cycle, then include the “ands” for the next. The next “one” should arrive with the same click in both cases. If it arrives early, slow down and check the space after “four and.”
Use alternating hands as a separate exercise
Label the right hand R and the left hand L. Make gentle R–L–R–L movements while counting four evenly spaced positions. You can begin with one movement per numbered beat. Keep the contact light and use a surface that will not be damaged. There is no benefit in striking furniture hard to make the exercise sound more like a drum.
When that feels manageable, make eight alternating movements across four beats: R on “one,” L on “and,” R on “two,” and so on. Keep the count audible enough to check where each movement belongs. If saying the count makes the pattern fall apart, return to the slower version rather than silently hoping the timing is correct.
Now begin the same sequence with L instead of R. The order becomes L–R–L–R, but the count stays unchanged. This is a comparison task, not a test of which hand is better. Notice whether one starting hand makes you hesitate at the beginning or whether the difficulty appears later in the cycle.
Alternating single strokes are also a basic sticking idea used in rudiment practice. The Vic Firth single-stroke roll reference is useful when you move to sticks. Light hand taps here are preparation for sequencing and timing; they do not certify that your stick grip or rebound technique is correct.
Add the foot without changing the hand count
Put the hands aside and mark the four numbered beats with a small, comfortable foot movement. It can be very light: the purpose is to locate the beat, not to send a thump through the floor. Stop if the movement feels uncomfortable. A shoe tapping on the floor is only a pulse marker in this exercise.
Then combine one foot movement per number with one hand movement per number. Both happen together. After a few steady cycles, keep the foot on the numbers while the hands alternate through “one and two and three and four and.” The foot now marks four positions while the hands mark eight.
| Count | Hand | Foot pulse |
|---|---|---|
| 1 | R | Yes |
| and | L | No |
| 2 | R | Yes |
| and | L | No |
| 3 | R | Yes |
| and | L | No |
| 4 | R | Yes |
| and | L | No |
If the foot starts following every hand movement, remove one layer. Keep the foot and spoken count, then add only the right-hand positions. Bring the left hand back once you can hear where the spaces are. There is no need to repeat a confused eight-part pattern dozens of times when a simpler version shows the relationship clearly.
Separate the musical pattern from the movement used to practise it
A drum part gives different sounds different jobs. For a first listening example, place a kick sound on beats one and three and a snare on two and four. Count the four beats while listening to, or triggering, those sounds. You can try this slowly with the virtual drum kit.
On a real set, the bass drum is normally played through a pedal, while a snare is played with sticks. On a laptop, you may trigger both sounds with your fingers. The musical placements can still be compared, but the laptop movement is not a model of the physical drumming movement.
Do not combine every exercise into one task immediately. First understand the sound pattern. Then practise a simple movement sequence away from the screen. Finally, when you have access to a kit, learn how those placements map onto the real instruments with appropriate guidance.
A pad, a tabletop and a screen are not interchangeable
A purpose-made practice pad is an option when you want to work with sticks. Its feel varies by design, and it is not necessarily silent. Follow its instructions, use a stable support and check how much vibration reaches other rooms. Buying a pad does not remove the need to learn a suitable grip and relaxed stroke.
Without a pad, keep equipment-free exercises genuinely light. Avoid striking glass, a computer, a phone or delicate furniture with sticks. A soft surface changes the response, so do not compensate for a lack of rebound by forcing harder strokes. If your next goal is specifically stick technique, arrange a suitable surface and instruction instead of improvising a damaging setup.
A screen is best treated as a sound reference and a short interaction tool. It lets you distinguish drum sounds and explore where they fall in a pattern. It cannot tell how tightly you hold a stick or whether a pedal movement is efficient. Our rhythm worksheets provide another way to work on counting away from the screen.
Account for sound delay before blaming your timing
If a sound seems to arrive after your touch, pause the exercise and check the setup. Wireless audio, browser processing and the device itself can affect what you hear. Compare a few isolated taps with the device speaker or a suitable wired connection, at a comfortable volume, before drawing conclusions about your playing.
Do not use a web instrument as a precision timing assessment unless that tool explicitly measures and accounts for the relevant delay. KulakApp’s virtual drum page is a way to try sounds, not a laboratory test of your rhythmic accuracy. A delayed sound and a late movement can feel similar but require different solutions.
An adjustable 15-minute practice plan
The following outline is an original practice suggestion, not a research-backed dose or a promise of improvement within a fixed period. Shorten it, add breaks or repeat just one section according to your situation. The useful feature is the separation of tasks, not the exact number of minutes.
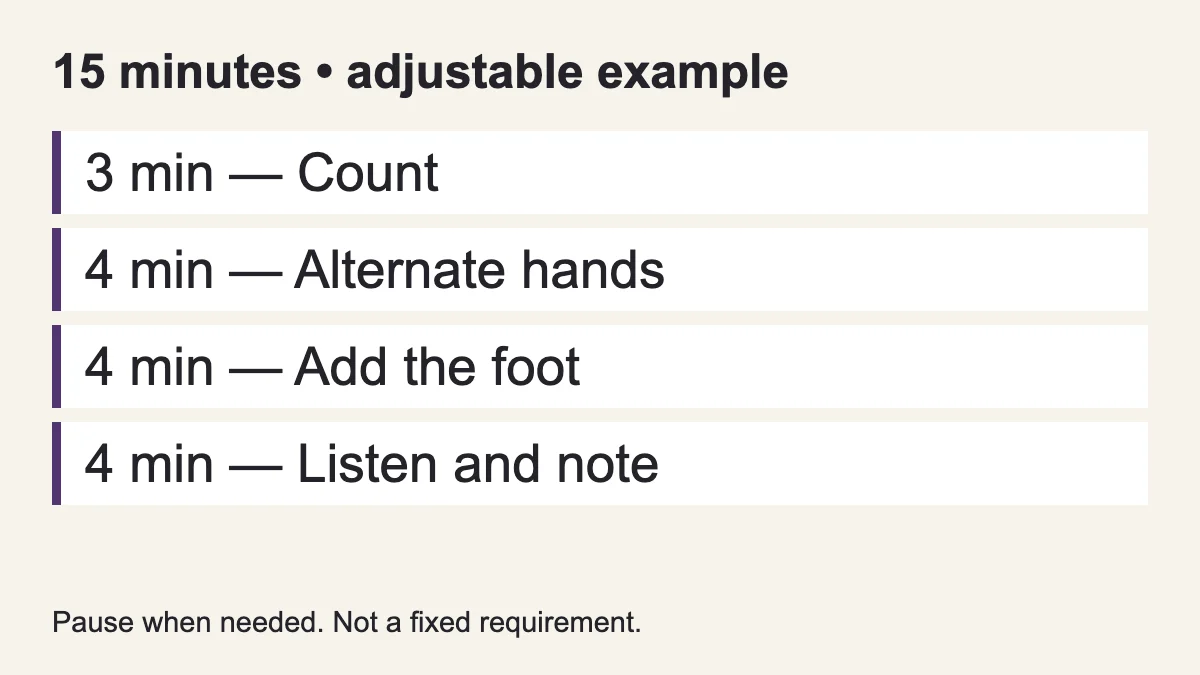
- Three minutes: count. Follow four steady beats, then place an “and” between them. Keep the main beat unchanged.
- Four minutes: alternate hands. Work on one simple R–L pattern, then compare an L–R start. Stay light and comfortable.
- Four minutes: combine two layers. Keep the foot on the numbers and place the hands between them. Simplify immediately if the relationship becomes unclear.
- Four minutes: listen and record an observation. Compare kick and snare placement, then write one specific point to revisit.
A useful note might read: “The foot joins the left hand on the ‘and’ after beat three.” That identifies a location and a relationship. “Bad coordination today” does neither. On your next attempt, work only through beats three and four before returning to the whole cycle.
Make the next session a small experiment
Keep the same count and pattern for several sessions while you learn what a comfortable attempt feels like. Then change one variable: the starting hand, the length of the pattern or the tempo. If you change all three, it becomes difficult to tell why the exercise suddenly feels harder.
You can organise a fortnight around two modest goals rather than a daily speed ladder. In the first part, learn to maintain the count while alternating hands. In the second, keep that count while adding the foot pulse. This is a planning example, not a deadline: stay with the first task longer if it still needs attention.
Write the count you used alongside any tempo setting. “60 BPM, one click per numbered beat” is more informative than “60.” If a later exercise uses the click for a different subdivision, the same displayed number will no longer describe the same rhythmic relationship.
Troubleshoot the smallest failing part
| Observation | Try next |
|---|---|
| The pattern accelerates when “ands” are added | Speak the subdivision without moving, over the unchanged click |
| The foot copies every hand tap | Remove the left hand and rebuild the two layers |
| There is a gap before the next “one” | Repeat only “three and four and one” |
| The sound arrives noticeably late | Check the audio route with isolated taps |
| Taps become forceful or uncomfortable | Stop, rest and reconsider the setup; do not push through pain |
When you return to a real kit, start simpler than your most complicated tabletop exercise. Explore one sound, then two, while maintaining the count. Drum placement, stick response, pedal movement and volume balance are new information. Needing time to adapt does not make the earlier counting work useless.
Questions beginners often ask
Can I learn drums entirely without a drum set?
You can begin several supporting skills without one. Full playing technique also needs experience with the instrument. Treat equipment-free work as preparation and maintenance, not proof that a screen or a desk teaches every part of drumming.
Do I need sticks for the first exercise?
No. Counting and gentle hand movements are enough to begin this routine. Introduce sticks when you have a suitable surface and a clear technical task. Purchasing equipment is not itself a practice method.
Should I always practise faster?
No. A more even count, a cleaner restart or a clearer distinction between two layers can be a useful next step. Speed is only one variable, and increasing it can hide the detail you were trying to understand.
Sources and scope
Basic kit roles and beginner practice concepts were checked against Drumeo’s introduction to playing drums; alternating sticking is linked to the Vic Firth reference above. The counting grids, troubleshooting suggestions and session structure here are original KulakApp examples. They are not copied song parts, individual technique assessments or a replacement for a drum teacher.